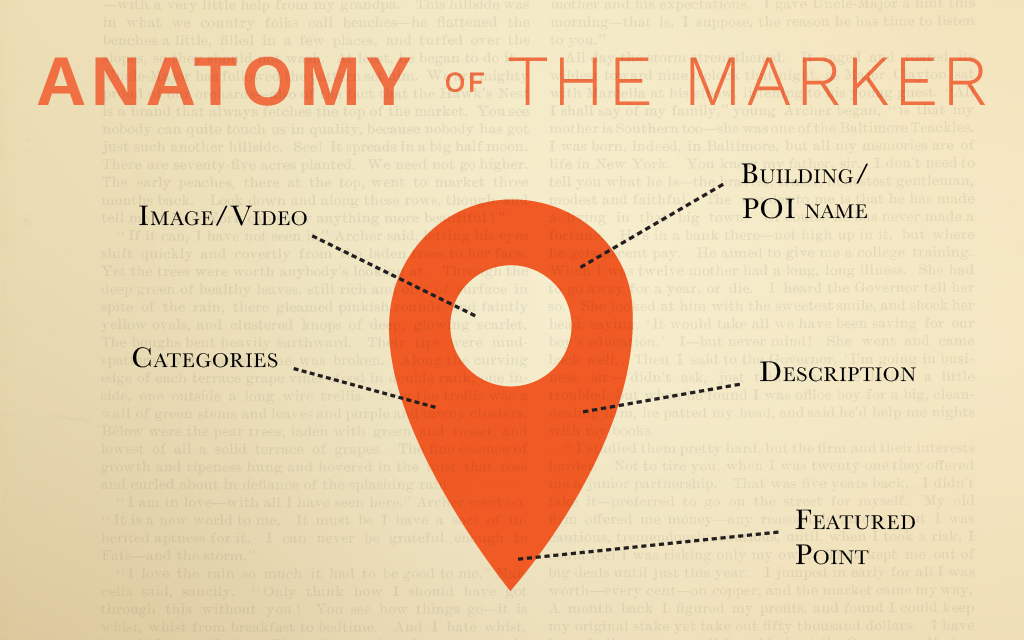
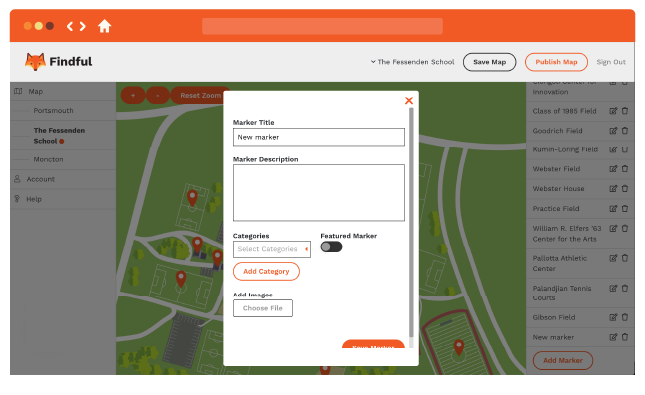
You’ve got your map, you’re ready to go, you add your first marker and you get a popup window with a lot of fields on it. You see Marker Title, Marker Description, Categories, Featured Marker, and Add Images. In this post, we’ll go through one-by-one to make sure that each marker you placed is optimized for your Findful map.
Marker Title
This one is easy! This is simply the building or other location name. Turf fields, arts buildings, landmarks, statues, commons or quads — everything that is on your map can have a marker and clear naming conventions make it easy for visitors to find where they’re going. Be careful about how you communicate location names internally and externally and be consistent about your naming conventions in other communications materials. You don’t want to send out an email calling an event location by one name and then have it be slightly different in your Findful map.
Marker Description
Here is where you can include as much or as little information as you want about a particular location. COnsider the history of the building — is it the first building on your campus? The newest? The one with the most interesting architecture? Consider what makes that location unique. Then, consider what goes on inside — are there classrooms where lectures take place, or art rooms where creativity thrives? Do you have large soundproof rehearsal spaces or a library with learning commons? Is there a state of the art innovation center that stands at the center of your STEM or STEAM programming or a cafeteria that keeps your community fed and is a space for students and faculty to interact on a social level?
Giving your markers a personal feel for how that space benefits your community will help visitors get a sense of the type of place they’re visiting. If you are thoughtful about the way you communicate with your visitors about your campus community, visitors will get a sense of the culture you’ve created before they’ve even walked into a building.
Hint: Keep in mind that visitors are reading these descriptions on a mobile device! While there is no character limit to your marker descriptions, there may be a limit to how much information your visitors want to take in before heading to the next location.
Categories
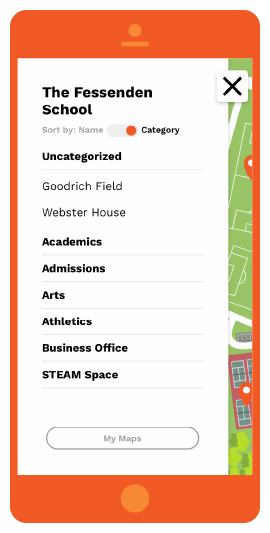
When a map app user downloads your map and views it, all of those markers are visible to them. For some campuses, this could mean literally hundreds of markers! Categories are a great way to narrow down the scope for your user. If they know they need to go to Admissions or a particular athletic field, navigating to the correct category and finding the destination there makes life easy.
If you don’t see a category that is appropriate for your marker, hit the “add category” button to make a new category.
Featured Marker
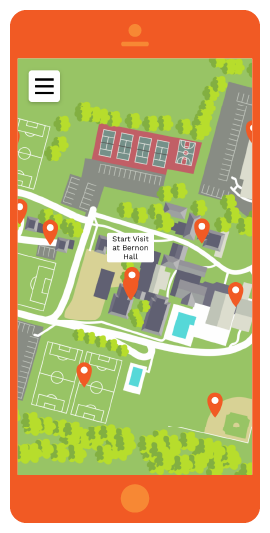
While regular markers show up on your map as a plain ole marker, a featured marker will show the marker title on the map. This is a great way to make important locations stand out for visitors. If all visitors need to report a certain building to check in, make that building easy to find by making it a featured marker. Is parking always an issue on your campus? Consider adding a marker to your visitor lot with the title “visitor parking” and making it a featured marker. Think of featured markers as a way to highlight markers. Just don’t use featured markers too often on one marker set or nothing will stand out anymore.
Add Images
Adding images of the exterior of the building serves as a great confirmation to a visitor that they’re in the right place. Including additional images of the interior of the building helps to tell the story of what happens inside. Short videos can really help a space come alive for your visitors. What if you have a visitor on the green or quad in the winter but you want to give them a glimpse of how the space comes to life in the spring? A video is a great way to take the limited stories that still photographs tell a step further.
Use images or video to help complete the story of the marker description. If you mention an amazing rehearsal hall that was just built in your description, be sure to include a photo, as well!
Save Marker
This is the most important button in this whole window! After all of the thought you’ve put into your marker, you need to save it!
Hint: Saving your marker will then place your marker in the list of markers on the right-hand side of your map. You need to save your MAP as well as each marker in order to not lose your work!
Related Content:
5 Tips for Adding Value to Your Findful Map